A good chimney cleaning service does more than push a brush through a flue. It protects your home, extends the life of your fireplace system, and reduces the chances of a chimney fire. Proper preparation makes the visit safer, faster, and more thorough. After decades of seeing what goes right and what slows crews down, I’ve put together a homeowner’s guide that covers the details professionals appreciate and the pitfalls that catch people by surprise.
What a Thorough Chimney Cleaning Actually Involves
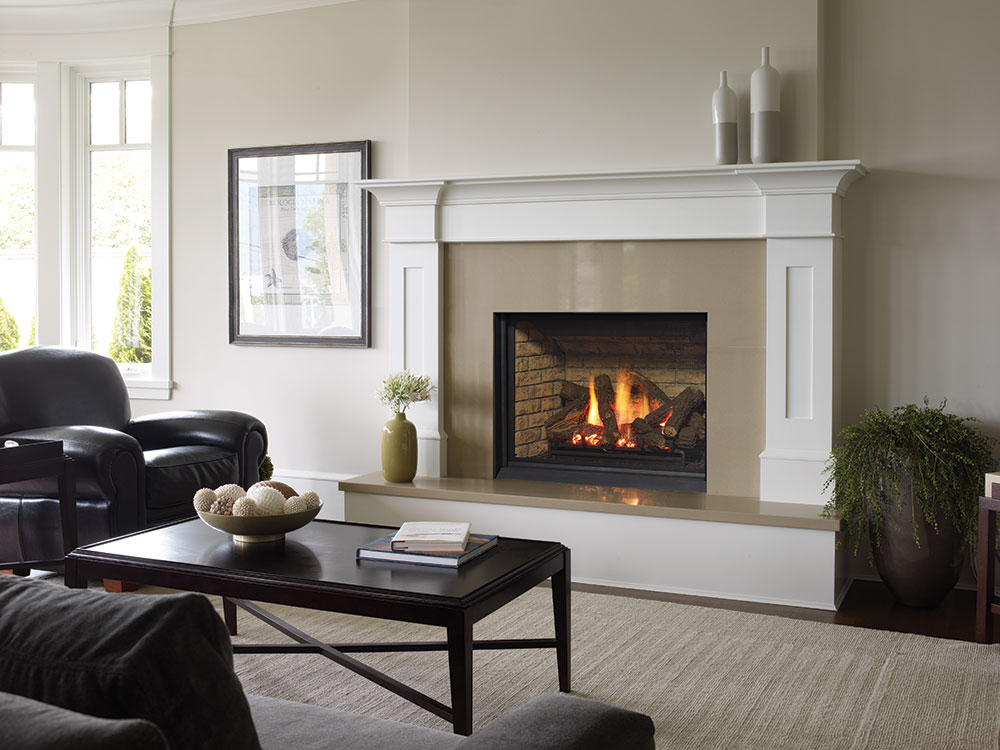
If your only frame of reference is a quick sweep and go, raise your expectations. Crews start with a site assessment. They evaluate the hearth, firebox, damper, and any visible chimney components. Then they set containment to keep soot and creosote contained, often with an industrial vacuum operating at the brush head or at the hearth, depending on the method and your home’s layout.
From there, technicians brush the flue to remove soot and creosote. In a masonry chimney that’s typically steel or poly brushes sized to the flue tile. For many stainless liners, they may use rotary rods with nylon heads. They clear smoke shelves, baffles, and accessible elbows, and they remove stubborn glazed creosote using specialized tools or chemical treatments when appropriate. Good companies finish with chimney inspections, which often include camera scans to detect cracked tiles, gaps, offset joints, and hidden blockages.
Done right, the visit is part cleaning, part diagnostics, and part safety audit. Your preparation sets the stage for all three.
Safety First: The 24-Hour Burn Rule and Fuel Shutdown
If you burned a roaring fire the night before, your chimney is still radiating heat you can’t feel from the room. Many technicians will not proceed if the system is warm. A basic rule: no wood fires for at least 24 hours before a chimney cleaning service. Ashes can hold heat much longer than you expect, especially in deep fireboxes and stoves.
For gas fireplaces and gas fireplace inserts, turn the unit off and shut the gas supply at the service valve if accessible. Electronic ignition systems can still cycle pilot lights, so disconnecting power to the appliance is prudent. Electric fireplace inserts don’t produce combustible residue in the flue, but if you have a hybrid system or a shared chase with venting nearby, power the unit down and allow access to the chase without energized heaters.
If you have pellet appliances, let the hopper run down and power off the unit well ahead of time. Pellet venting collects very fine ash in elbows that becomes airborne during cleaning, so a cold system helps containment.
Create a Clean Work Zone Without Stress
Technicians bring drop cloths, zip poles, and vacuums, but the fastest way to protect your home is to give them space to stage and move. Think of it like setting up for a minor renovation. The difference is that soot travels. It behaves like talcum powder. With a vacuum running at negative pressure, most of it stays put. Without space, a stray puff rides air currents into white curtains and upholstery.
Clear a five to six foot radius in front of the hearth. Move furniture, plants, baskets, stacked firewood, and pet beds. If you have a rug you love, roll it back. Remove mantle decor that can fall when the technician taps the flue or adjusts ladders. If you have built-ins with open shelving next to the fireplace, a light sheet taped in place reduces dusting later.
Upstairs, ensure attic scuttle holes, loft ladders, and any roof deck access are clear if you expect roof work. Some crews clean exclusively from the hearth. Others work from above, especially when they need to remove caps, chase covers, or animal nests. If you’ve had leaks, ice dam issues, or visible cracks at the crown, plan for roof access so they can inspect properly.
Pets and kids need a safe zone. Vacuum motors are loud, soot has an odor some animals dislike, and open doors for roof access create escape routes. Arrange a separate room or a brief outing.
Ash and Soot: How Much Should You Remove Yourself?
Homeowners often ask, should I shovel ash out first? A modest bed of ash in a wood-burning firebox is normal and helpful for technicians because it shows the burn pattern and the ash’s texture hints at moisture and combustion efficiency. An ash pile that reaches the grate bars or spills into the room is another story. Scoop down to an inch or less, store the ash in a metal bucket with a lid, and keep it outside on a noncombustible surface. Even gray ash can hide embers. I’ve seen metal buckets melt vinyl siding hours after the homeowner swore the ashes were cold.
Do not vacuum ash with a household vacuum. The filters are not designed for ultra-fine particulates and embers can smolder inside the canister. If you own a metal canister ash vacuum with a HEPA filter rated for hot ash, that’s fine for the firebox floor. Leave the rest to the crew’s soot-rated vacuum.
For gas fireplaces, wipe the glass lightly if soot obscures the flame view, but don’t disassemble logs or move ember material. The log placement and ember distribution affect the burn pattern. Technicians need to see how the unit has been operating, and they will remove and reassemble components as part of service if warranted.
The Value of a Baseline Inspection Before Cleaning
The two services often occur together, yet they serve different purposes. A level 1 inspection looks at readily accessible portions of the chimney and appliance. It checks for obstructions and basic structural soundness. A level 2 inspection, which includes a camera scan, is recommended with any change in appliance type, property sale, or after an operating malfunction or chimney fire.
If you recently switched from open wood to a gas fireplace insert, or you’re considering a fireplace installation of a new stove or electric fireplace inserts, be explicit with the scheduler. The technician may allocate additional time for a level 2 inspection. Skipping the scan to save 20 minutes is penny-wise, pound-foolish. I once scoped a flue that looked fine from below. The camera found a 3-inch gap where a liner had pulled from the top plate, a perfect trap for exhaust and moisture.
Mention prior work orders too. If you’ve used a west inspection chimney sweep or another regional provider, gather their reports. Technicians learn faster with a system’s history in hand.
Parking, Pathways, and Ladder Access
A typical work truck carries a 28- or 32-foot ladder, vacuums, rods, brushes, tarps, and camera gear. Close parking matters. If you can free the driveway spot closest to the house, do it. Technicians will haul gear in and out several times. In winter, clear ice and snow. Wet ladders and icy decks mix poorly. In summer, clean up yard debris at the base of the chimney to make ladder footing safer.
Roof pitch and height dictate equipment. If your chimney is more than two stories or located on a steep roof, expect the crew to use tie-offs or additional safety equipment. Some brick chimneys near valleys require stand-off brackets for stable ladder placement. These details drive schedule length. When the dispatcher asks about stories, roof pitch, or the chimney’s location relative to ridgelines, they’re not making small talk, they’re planning safety.
Managing Smoke Detectors, HVAC, and Airflow
Negative pressure keeps soot inside the containment zone. Competing airflow can work against that. Turn off whole-house fans, range hoods, powerful bath fans, and the HVAC blower while the cleaning is underway. If your home is tight and uses a balanced ventilation system, tell the crew at the door. They may adjust how they create draft in the work zone using make-up air or temporary seals.
Smoke detectors near the hearth can alarm when fine dust drifts during setup. You can bag a detector temporarily with technician approval, although pros usually prefer to create better containment rather than disable safety devices. If you’ve got hardwired detectors, the alarm might cascade to the whole system. Knowing the panel location helps turn the noise down quickly if that happens.
What Professionals Check While They Work
Good chimney inspections read like an anatomy lesson. Expect notes on:
- Flue integrity, including visible cracks, spalling, and mortar joint condition if you have clay tiles, or seam integrity for stainless liners. Firebox and smoke chamber transitions. Parge coatings inside smoke chambers often crack or fall away. A rough, corbelled smoke chamber creates turbulence that deposits creosote faster. Damper operation. Throat dampers warp and seize. Top-sealing dampers can bind if the cable is frayed or the cap is misaligned. Chimney caps, chase covers, and crowns. A rusted chase cover on a factory-built chimney behaves like a funnel, delivering water to the framing below. A cracked crown invites freeze-thaw damage. Clearances to combustibles. Mantels, trim, and framing too close to the flue or insert collar are a common fire code issue. Clearances vary by appliance and listing.
Those notes guide maintenance decisions, from minor mortar joint repointing to a full liner installation. If something sounds unfamiliar, ask to see photos or live camera footage. The more you understand the components, the better you can assess bids and prioritize repairs.
Special Considerations for Different Fuel Types
Wood-fired systems produce creosote that accumulates at different rates depending on fuel moisture and burn habits. If you burn wood with a moisture content above 20 percent, expect heavier deposits. Slow smoldering fires are the worst offenders. A hot fire with seasoned wood produces less, but no system escapes buildup entirely.
Gas fireplaces burn cleaner but not maintenance-free. Venting can accumulate sulfur compounds that react with moisture to corrode metal liners. Soot on glass often points to improper air-to-fuel ratios or misaligned logs. A gas fireplace insert, properly sized and vented, improves efficiency, but the annular space around the liner still needs inspection for heat damage or wildlife intrusion.
Electric fireplace inserts don’t use venting and therefore don’t need a chimney sweep for cleaning. Yet they sometimes sit in existing hearths or chases where an old flue still runs. If you converted a wood or gas system to electric, keep the abandoned vent sealed and capped, and ask your technician to verify the cap’s condition during an exterior inspection. Squirrels and starlings love abandoned chimneys.
Preparations That Shorten the Visit Without Cutting Corners
Small steps at the front end speed up meaningful work later. If you have a woodpile, stage the next week’s supply away from the hearth so it doesn’t collect dust. Empty decorative ash buckets and remove kindling baskets from the working radius. If you have a glass door set, open it and set the key aside so the technician doesn’t hunt for it. Move any fire screens and putirons to a side wall.
Gather your questions ahead of time. If you’ve noticed smoke spill when you open the doors, a persistent campfire odor, or water stains near the mantel, write it down. Odors often come from creosote deposits activated by humidity. Smoke spill can be a flue sizing issue, a negative pressure problem, or a blocked cap screen. The best time to troubleshoot is during and immediately after cleaning when the system is open and the camera is out.
When High-Creosote Scenarios Change the Plan
Not all chimneys are equal after the first brush. Glazed creosote, the hard, shiny stuff, does not surrender to standard brushing. Sometimes it takes mechanical chains or whip heads driven by a drill. In severe cases, technicians apply a catalytic treatment and schedule a return visit. That adds time and cost.
If you’ve burned resinous softwoods exclusively, operated with the damper half-closed for long, low fires, or run an oversized stove on a small flue, your deposits may be stubborn. Transparency helps. Tell the scheduler how you burn. I’d rather bring the right head and a second vacuum than reschedule because glaze won the first round.
What To Expect With Inserts and Factory-Built Systems
Fireplace inserts and factory-built fireplaces use listed systems with precise venting requirements. For a wood-burning insert, a full-length stainless liner usually connects the insert collar to the top plate at the chimney cap. Partial liners that dump into a smoke chamber are outdated and often unsafe. During service, technicians disconnect as needed, brush the liner, clean the smoke shelf and firebox, and verify the insert’s blowers and air controls.
Gas fireplaces and gas fireplaces inserts rely on co-linear or co-axial venting, often with a termination cap that incorporates both intake and exhaust. Birds and bees find those warm caps attractive. I’ve pulled nests the size of beach balls from intake cavities. If your flames look lazy, the glass has a sooty sheen, or you smell exhaust, stop using the appliance and schedule service. Venting issues with gas carry different risks than wood, including carbon monoxide intrusion.
Electric fireplace inserts simplify venting to zero, but still merit a fit-and-finish check inside the old firebox. Loose bricks, falling mortar, and damp odors are clues that water is entering through a failed crown or cap. Even if the electric unit is happy, the structure around it may not be.
A Simple Day-Of Checklist
Use this quick, five-step list the morning of your appointment. It covers the items that most often cause delays.
- No fires for at least 24 hours, gas supply off to gas units, electric units powered down if sharing a chase with vented appliances. Clear a five to six foot radius around the hearth, remove fragile decor from the mantle, and roll back nearby rugs. Provide driveway space for a service truck and safe ladder access to the roof if needed. Turn off whole-house fans and HVAC blowers during the visit; keep pets and kids in a separate room. Have prior reports, appliance manuals, and your notes on odors, smoke behavior, or leaks ready.
Paperwork, Photos, and How To Read a Service Report
A professional report should include photos from the hearth and the roof, with clear labels. If a technician flags a cracked crown, you should see a close-up with a ruler or coin for scale. If they note a damaged flue tile at the third joint, the camera stills should show it. Ask for measurements and material specifications when they recommend repairs. A proposal for a new chase cover should specify gauge, metal type, slope, hemmed edges, and welded or riveted seams.
Some companies use standardized inspection levels. Others describe findings in plain language without formal levels. Either way, insist on clarity. Vague notes like “needs work” tell you nothing. After a chimney cleaning service, you should walk away knowing what’s safe to use, what needs repair soon, and what can wait.
Timing, Frequency, and Seasonal Strategy
The right cadence depends on fuel, frequency of use, and appliance type. For wood, the rule of thumb is to clean when soot and creosote reach 1/8 inch in the flue, or at least once a year if you burn regularly. Weekend-only users might stretch to 18 months if inspections show minimal deposit, but don’t guess. A mid-season check after the coldest months is smart if you burn daily. For gas fireplaces, annual service is still wise to check venting, burners, and safety controls. Electric fireplace inserts need no vent cleaning, yet an annual exterior look at the chimney or chase avoids surprise leaks.
Book shoulder seasons. Late summer to early fall gets busy, but spring and early summer offer easier scheduling and more thorough roof work while weather cooperates. If you need masonry repairs, you want warm, dry conditions. Emergency repairs in December cost more and take longer.
When Cleaning Reveals Bigger Decisions
Sometimes the camera finds more than soot. A compromised flue might push you toward a stainless steel liner. If you’re already considering a fireplace installation upgrade, the right time to decide is after you see the inspection images. A gas fireplace insert can modernize a drafty open hearth, cut wood hauling, and provide steady heat with a thermostat. If you prefer flame without combustion in the house, electric fireplace inserts deliver ambience and zone heat without venting. Each option has trade-offs.
- Gas delivers responsive heat and real flame. It requires a gas line, listed venting, and annual safety checks. Flames look best when the logs are clean and set by the book. Electric offers simplicity and installation flexibility. It can go where venting is impractical, yet it won’t heat like a full gas system. Your electric rate determines operating cost. High-efficiency wood inserts give the most heat per dollar if you cut or source affordable seasoned wood. They demand the most discipline for fuel quality and yearly chimney inspections.
Lean on your technician’s measured advice. Companies that handle fireplace inserts often install and service them, which means they can tie their recommendations back to what they see in the field rather than a catalog.
Little Details That Protect Finishes and Fabrics
Soot finds light-colored fabrics. Close doors to nearby bedrooms if the chimney is centrally located. If your living room opens to the kitchen, cover the fruit bowl. I’ve seen a faint soot dusting on apples after an enthusiastic rotary brush in a tight flue. If your walls were recently painted, let the crew know. Some masking tapes can lift fresh paint, and technicians can adjust where they tape containment.
For homes with ultra-pale carpets, ask for hardboard runners or bring out your own. Most crews carry floor protection, but setting expectations early prevents awkward conversations when a black footprint appears at the threshold.
Pricing Realities and What Drives Cost
Basic single-flue cleaning and a level 1 inspection typically fall into a predictable range in most markets. Add-ons push it up. A level 2 with camera imaging and a full report costs more. Steep roof access, tall chimneys, severe glazed creosote, animal removal, and cap replacement all change the ticket. Expect material quotes for caps and chase covers to vary with metal choice. Galvanized steel costs less up front, stainless lasts longer in harsh climates, and copper appeals when aesthetics matter.
If you’re comparing bids, align scope. Does the price include a camera scan or just a visual peek? Is there a guarantee against soot leakage into the room? Will they clean the smoke chamber and shelf, or only the vertical flue? I’d rather pay a bit more for a documented, camera-verified clean than save fifty dollars and wonder what the brush missed.
After the Cleaning: When Can You Use the Fireplace?
With wood-burning systems, you can use the fireplace immediately after service if no repairs are outstanding. That said, if the technician applied a chemical creosote treatment or sealant in the smoke chamber, they may ask you to wait 24 to 48 hours. For gas fireplaces and gas fireplaces inserts, technicians often relight and verify operation before leaving. If parts were adjusted, they’ll test CO levels and draft. For https://pastelink.net/9pmvugk3 electric fireplace inserts, once the work zone is broken down, power can be restored right away.
Expect a light odor the first time you burn after a thorough clean. Residual dust or minor cleaning agents on internal surfaces can produce a faint smell for an hour or two. Open a nearby window slightly to balance pressure and speed dissipation.
The Edge Cases: Wildlife, Water, and Odd Smells
A chimney cap without intact screening is an invitation. Raccoons can descend a flue like a ladder. Birds nest inside top-mounted dampers or the gap where an old damper sits open. If you hear scratching, chirping, or a heavy thump behind the firebox walls, stop using the fireplace and call for removal before the cleaning. Do not light a fire to smoke animals out. It often ends badly for both the animal and your chimney.
Water is the other stealth intruder. Efflorescence on exterior brick, a musty odor at the hearth, or staining on the ceiling near the chimney chase points to failed flashing, a cracked crown, or a rusting chase cover. Cleaning won’t solve water, but the inspection will map the path. Solve water first, then any damaged liners or firebox components.
Burn odors that show up on humid days, even when the fireplace is idle, usually trace back to creosote off-gassing. A thorough chimney cleaning combined with better make-up air often solves it. In tight homes, consider a dedicated outside air kit for the fireplace or adjustments to a whole-house ventilation system to prevent the chimney from becoming the easiest path for outdoor air to enter.
Building a Long-Term Maintenance Rhythm
Think of your chimney like a car’s braking system. It doesn’t complain until it suddenly does, and by then you’re already in trouble. A modest routine protects the big investments.
Schedule annual chimney inspections. Clean based on findings. Burn seasoned wood if you use wood. For gas fireplaces, keep logs correctly placed and have the burner inspected. If you run an insert with blowers, vacuum the intake grilles a few times a season. Replace cap screens that corrode or clog. Keep gutters near the chimney clear so water doesn’t cascade onto the crown.
The payoff is tangible. Efficient fires, less smoke, safer operation, and longer life for your masonry or factory-built system. When your tech arrives to find the area clear, the system cool, and your notes ready, you set the scene for a clean that does more than remove soot. You get a real assessment of the heart of your home’s hearth, and the confidence to enjoy the season without a second thought.